Overview
This deployment guide describes how to configure HPE Aruba Networking Central NAC with Microsoft Entra ID and Intune to:
- Authenticate Windows 11 users and devices using EAP-TLS
- Assign access roles based on Entra ID group membership
- Enforce Intune compliance
- Perform client certificate enrolment against Central NAC PKI
- Deploy all required client configuration using Intune
It is possible to configure all of the above using the core feature set of Central NAC which does not require any additional licensing beyond Foundation AP licenses.
The following components must be configured:
Microsoft Entra ID
- App Registration
Central AP Config
- Roles
- WLAN Profile
Central NAC
- Identity Store
- Intune Extension
- Authentication Profile
- Authorization Policy
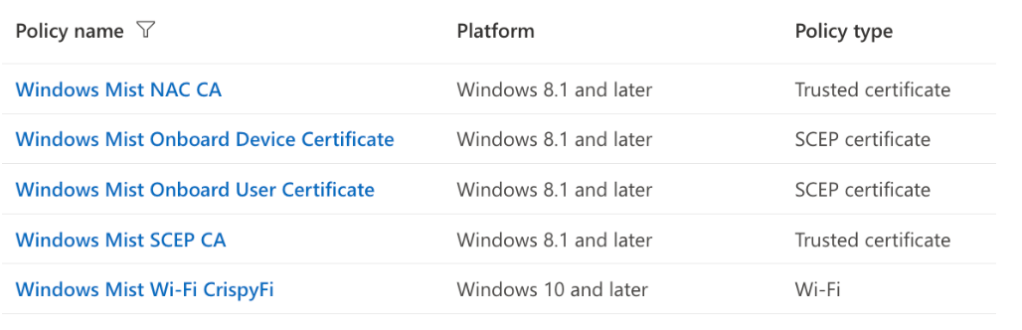
Microsoft Intune Configuration Profiles
- Trusted certificate profile
- SCEP certificate profile – Device
- SCEP certificate profile – User
- Wi-Fi profile
It is assumed that an existing Microsoft Entra ID tenant with Intune licensing is available with a Windows 11 device already enrolled.
A special thanks to Nicolas CULETTO for creating the Technote that helped with the UEM component.
Microsoft Entra ID – App Registration
1. Navigate to Entra ID > App Registrations and click New registration
| Parameter | Value |
|---|---|
| Name | Central NAC |
| Supported account types | Accounts in this organisational directory only |
2. Record Application (client) ID
3. Record Directory (tenant) ID
4. Navigate to Manage > API permissions
5. Grant API Permissions:
| Intune – Application permissions |
|---|
| scep_challenge_provider |
| Microsoft Graph – Application permissions |
|---|
| Application.Read.All |
| DeviceManagementManagedDevices.Read.All |
| Directory.Read.All |
| Group.Read.All |
| User.Read.All |
6. Grant admin consent for App Registration

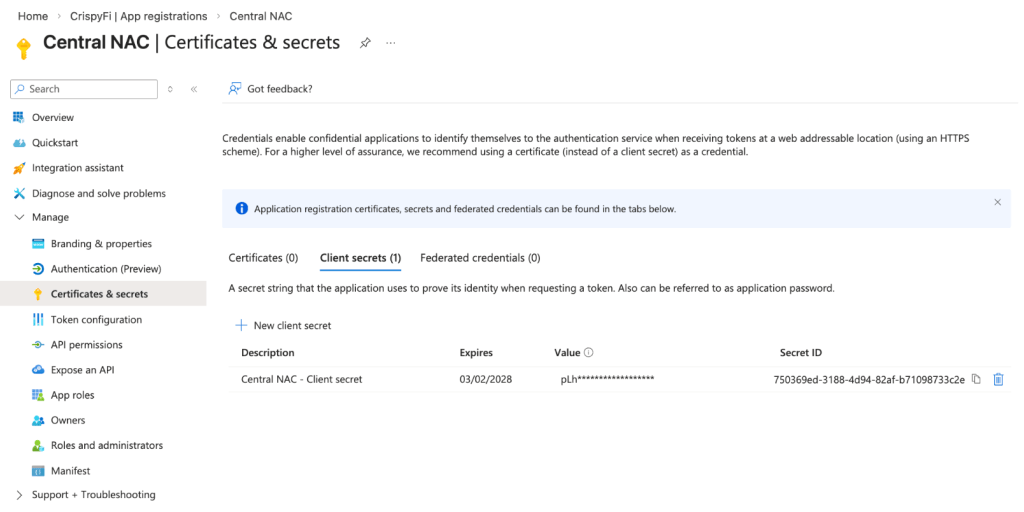
7. Navigate to Certificates & secrets > Client secret > New client secret
BEFORE LEAVING SCREEN: Record client Secret Id and Value
Central AP Config – Roles and Policies
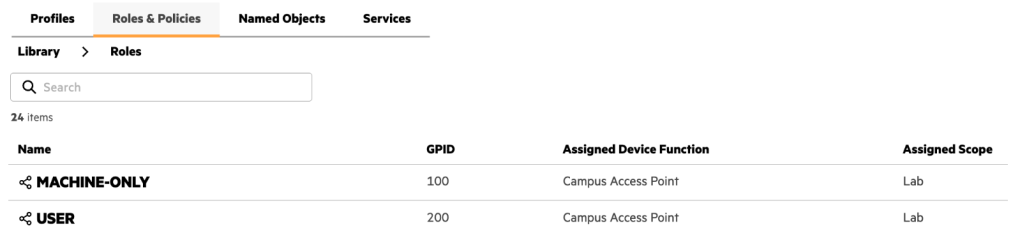
IMPORTANT: Roles and WLANs must be created at the Library level to be visible by Central NAC.
1. Create two roles in the Configuration Library, and assign the Device Function and Scope as follows:
2. Create a role-based policy in the Configuration Library, create rules for the newly created roles above and assign the Device Function and Scope as follows:

Central AP Config – WLAN Profile
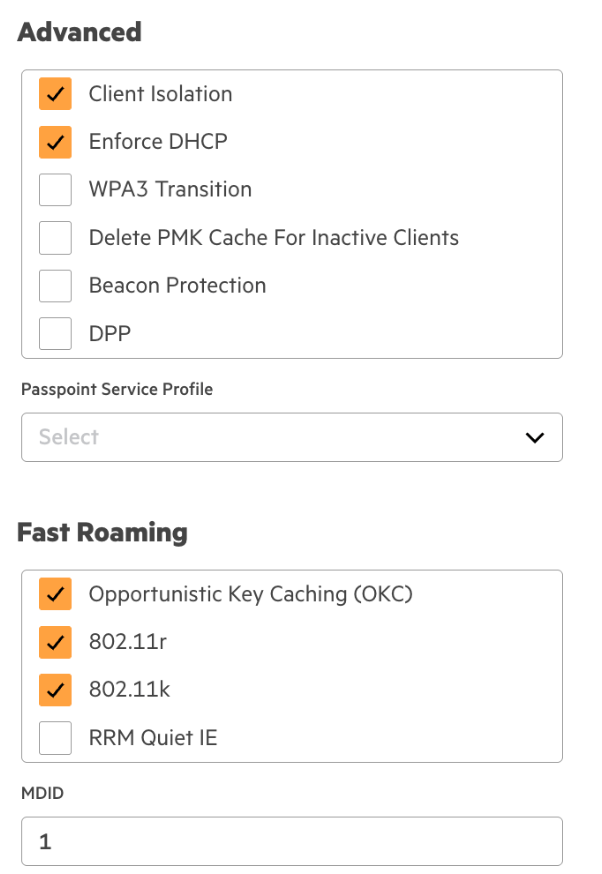
1. Create a WLAN profile in the Configuration Library with the following configuration, and assign the Device Function and Scope as follows:
| Parameter | Value |
|---|---|
| Name | <WLAN Profile Name> |
| ESSID Name | EAP-TLS |
| Security Level | Enterprise |
| Key Management | WPA3-Enterprise(CCM-128) |
| Server Group | Central NAC |
| Organization Name | <Your Organization Name> |
| Client Isolation | Enabled |
| Enforce DHCP | Enabled |
| 802.11r | Enabled |


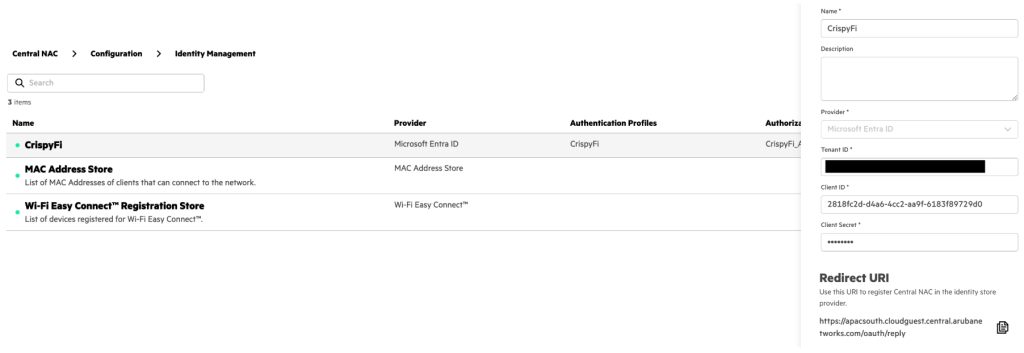
Central NAC – Identity Store
1. Navigate to Central NAC > Configuration > Identity Management and click Create Identity Store
2. Add the following configuration and click Create
| Parameter | Value |
|---|---|
| Name | <Identity Store Name> |
| Provider | Microsoft Entra ID |
| Tenant ID | <Tenant ID from App Registration> |
| Client ID | <Client ID from App Registration> |
| Client Secret | <Client Secret Value from App Registration> |
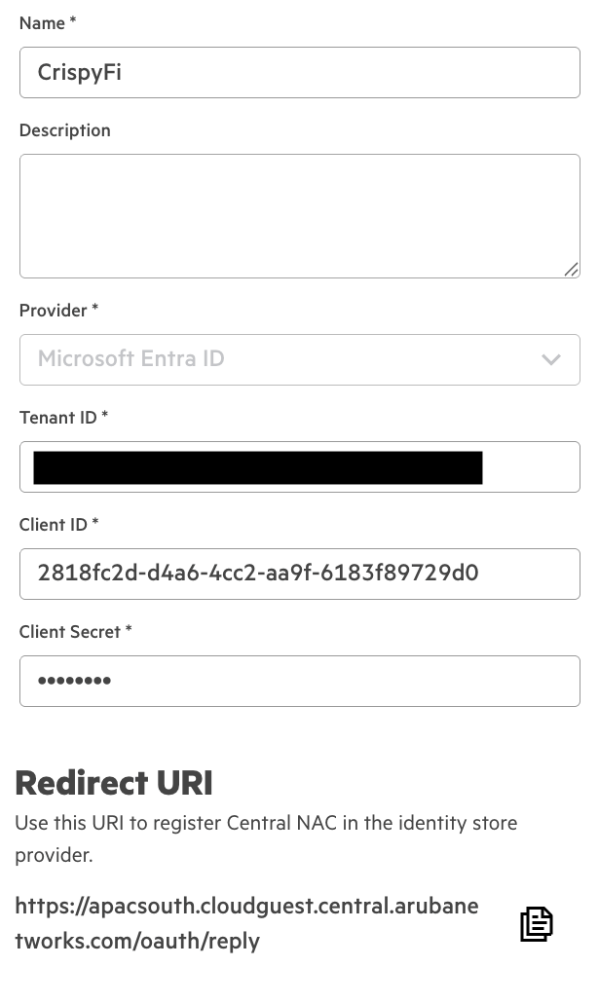
3. Copy and record the Redirect URI
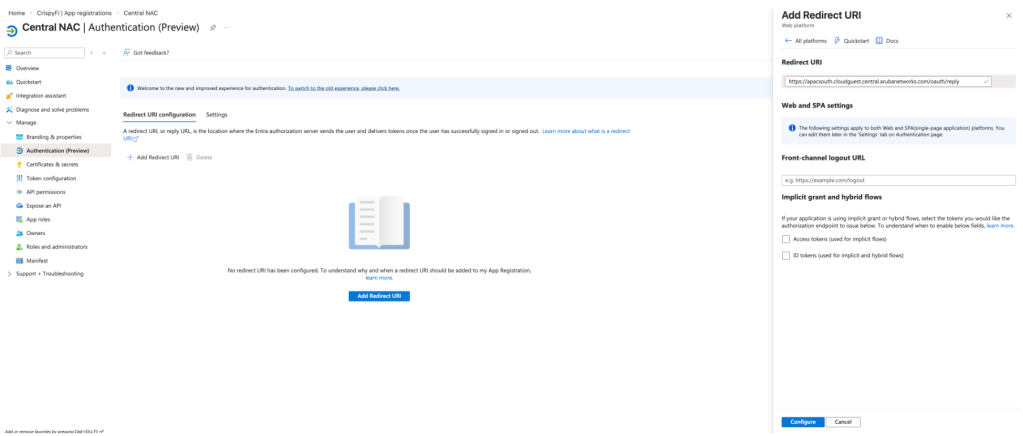
4. Under the Entra ID App Registration, navigate to Manage > Authentication and click Add Redirect URI
5. Select Web platform, paste the Redirect URI from the Identity Store and click Configure
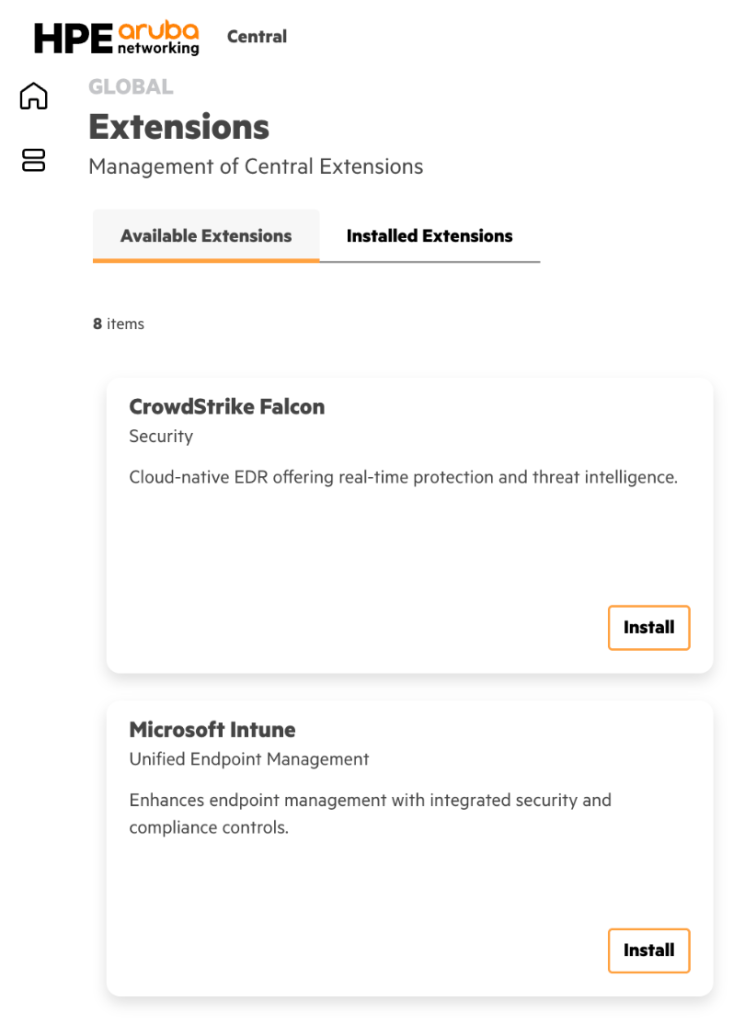
Central NAC – Intune Extension
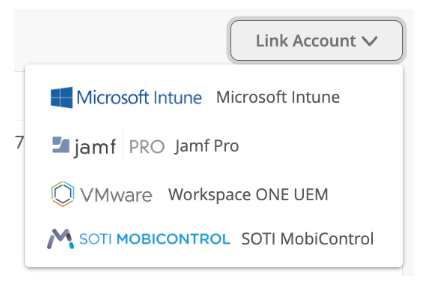
1. Navigate to Extensions > Available Extensions and click Install next to Microsoft Intune
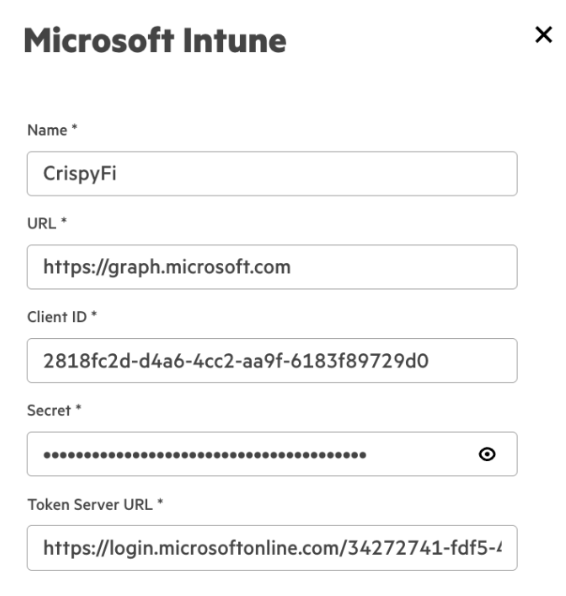
2. Add the following configuration and click Create
| Parameter | Value |
|---|---|
| Name | <Extension Name> |
| URL | https://graph.microsoft.com |
| Client ID | <Client ID from App Registration> |
| Secret | <Client Secret Value from App Registration> |
| Token Server URL | https://login.microsoftonline.com/<Tenantid>/oauth2/v2.0/token |
NOTE: Replace <TenantID> in the Token Server URL with your Entra ID Tenant ID.
Central NAC – Authentication Profile
1. Navigate to Central NAC > Configuration > Authentication Profiles and click Create Profile
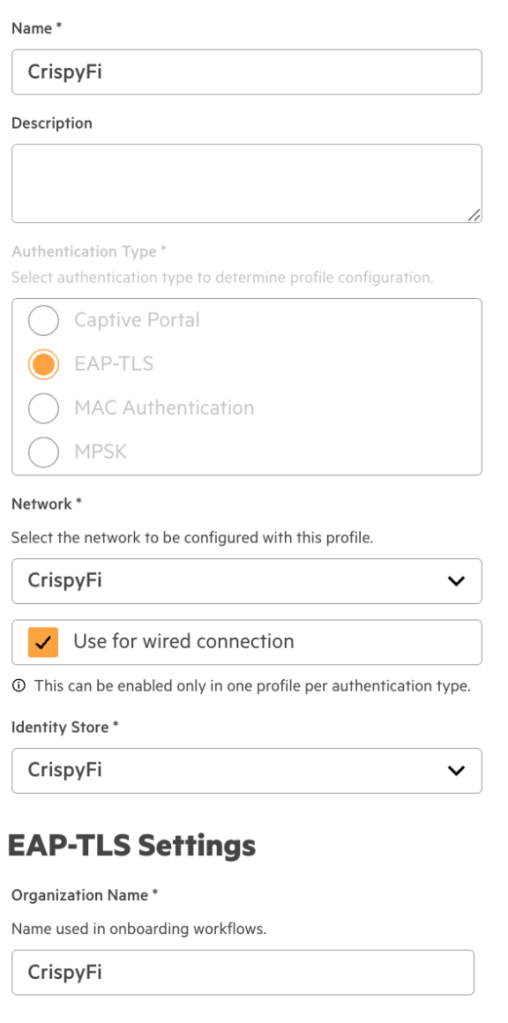
2. Add the following configuration
| Parameter | Value |
|---|---|
| Name | <Authentication Profile Name> |
| Authentication Type | EAP-TLS |
| Network | <Your WLAN Name> |
| Use for wired connection | Enabled |
| Identity Store | <Your Identity Store> |
| Organization Name | <Your Organization Name> |
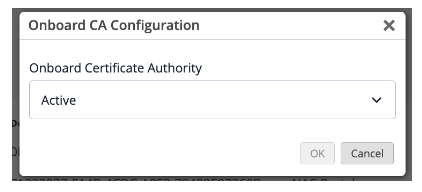
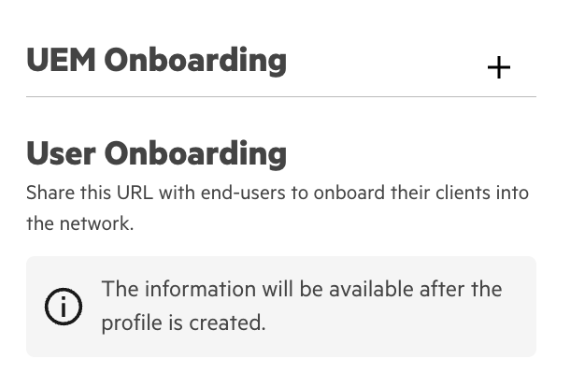
3. Click the + icon next to UEM Onboarding
4. Configure a name and select Microsoft Intune and the name of your Intune Extension from the drop-down menu
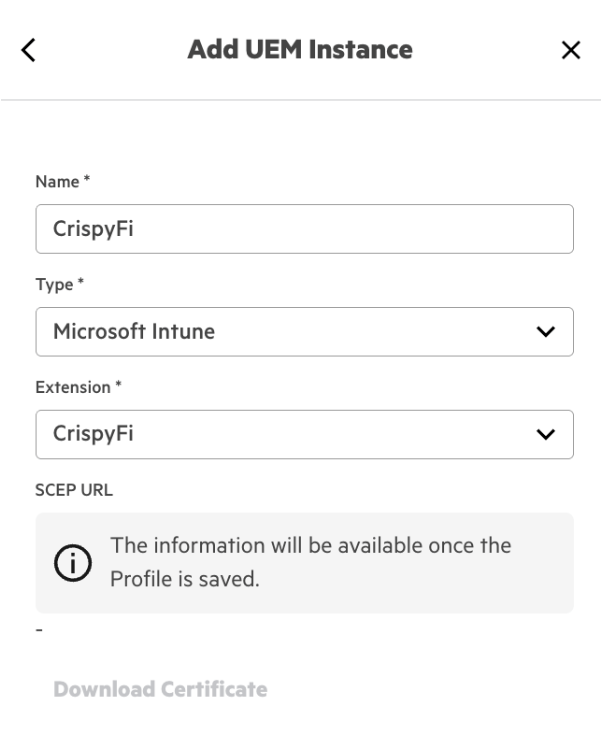
5. Click Create

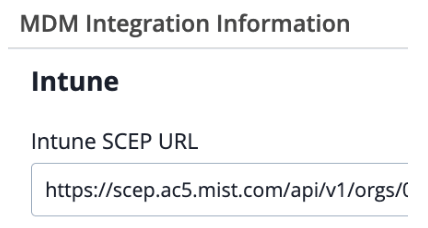
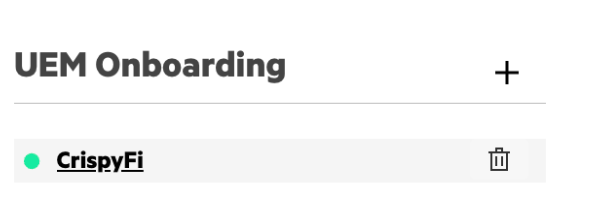
6. Edit the newly created profile, scroll down to UEM Onboarding and click the profile name
7. Copy and record the SCEP URL and click Download Certificate
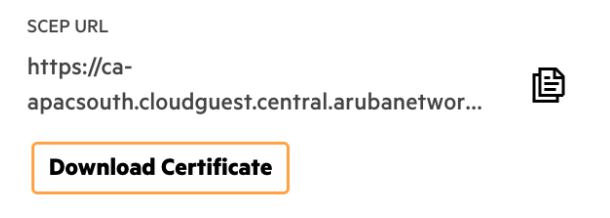
These will be used when creating the Intune Configuration Profiles.
Central NAC – Authorization Policy
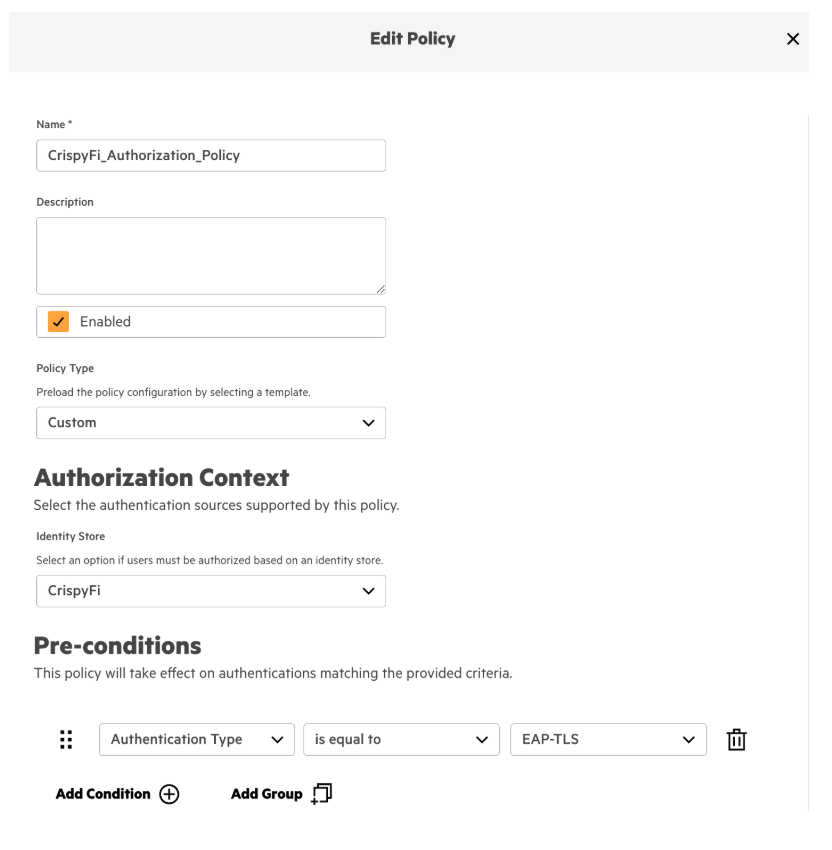
1. Navigate to Central NAC > Configuration > Authorization Policy and click **Create Policy
2. Add the following configuration and click Create
| Parameter | Value |
|---|---|
| Name | <Authorization Policy Name> |
| Policy Type | Custom* |
| Identity Store | <Identity Store Name> |
| Pre-conditions | Authentication Type is equal to EAP-TLS |
*NOTE: You can use a Policy Type of User if you don’t have a Premium Central NAC license.
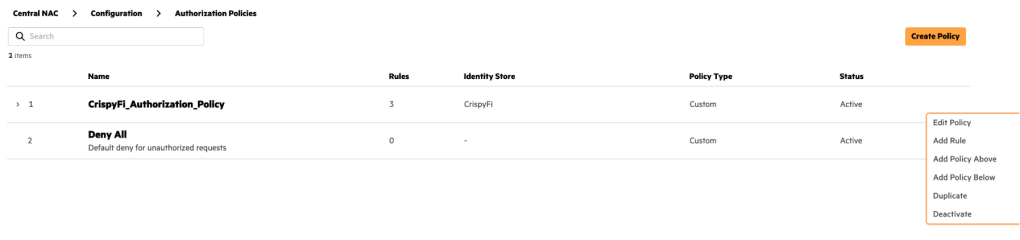
3. Click the ellipses next to the newly created policy and click Add Rule
4. Create a rule with the following configuration
| Parameter | Value |
|---|---|
| Name | User + Intune Compliant |
| Conditions | User Group(<Identity Store Name>) contains User Group NameAnd Client Tags contains any Intune: Compliant |
| Identity Store | <Identity Store Name> |
| Actions | Allow Access |
| Role | USER |

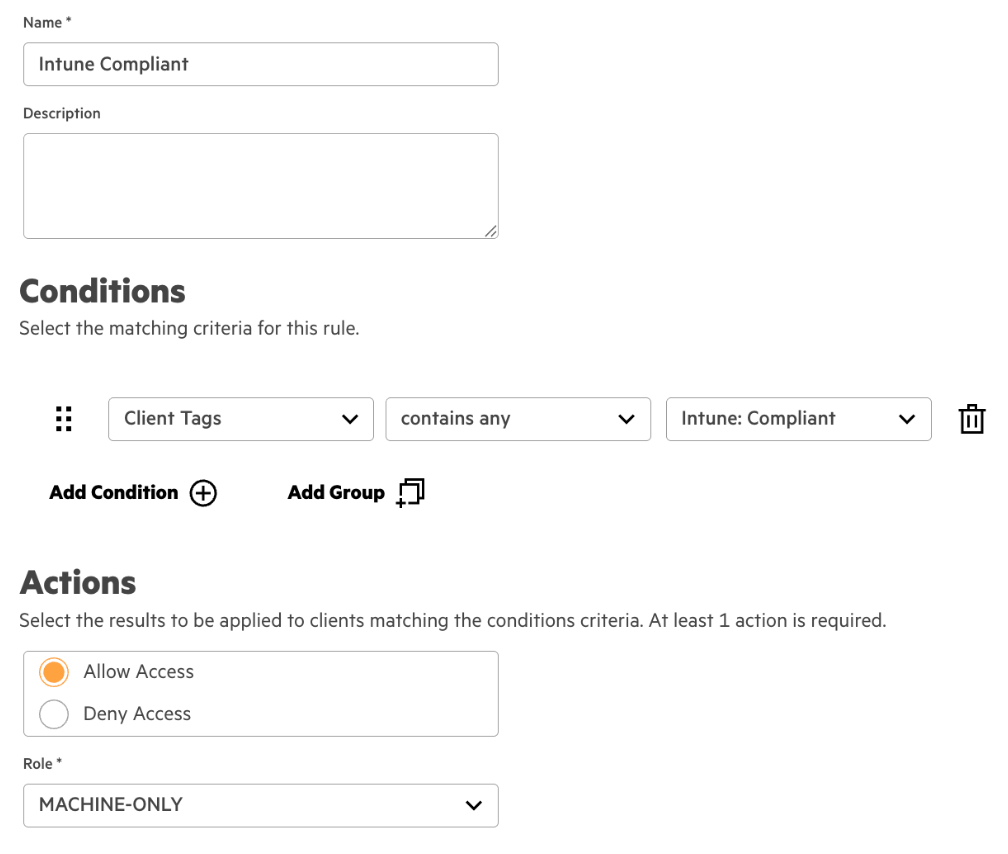
5. Create another rule with the following configuration
| Parameter | Value |
|---|---|
| Name | Intune Compliant |
| Conditions | Client Tags contains any Intune: Compliant |
| Identity Store | <Identity Store Name> |
| Actions | Allow Access |
| Role | MACHINE-ONLY |
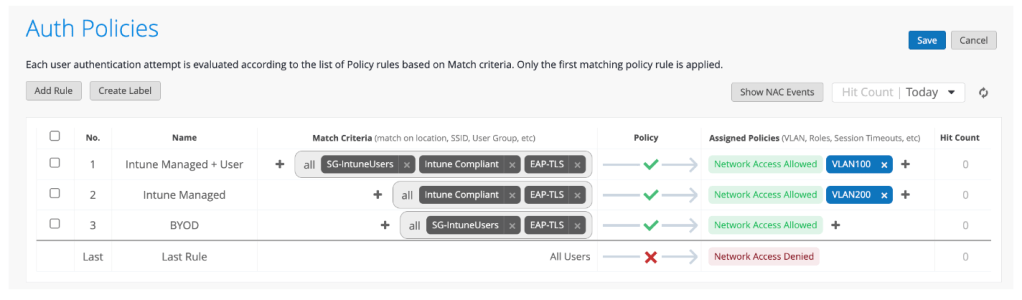
6. Review the configuration
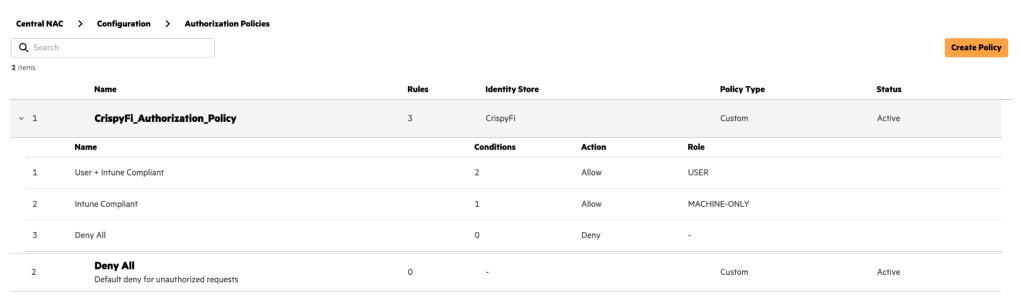
The first rule will allow user authentication, requiring:
- Certificate issued by Central NAC CA
- Member of specific user group
- Connecting from a compliant Intune managed device
The second rule will allow machine authentication, requiring:
- Certificate issued by Central NAC CA
- Connecting from a compliant Intune managed device
This will allow role-based VLAN access for users in different groups, and more restricted access for a Windows 11 device before a user logs in.
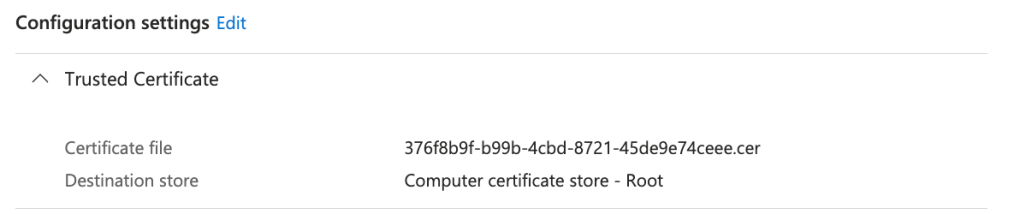
Microsoft Intune – Trusted certificate profile
Navigate to Microsoft Intune admin center > Home > Devices | Configuration profiles and Create a New Policy as follows:
| Parameter | Value |
|---|---|
| Platform | Windows 10 and later |
| Profile type | Templates |
| Template name | Trusted certificate |
| Name | Windows Central NAC CA |
Configuration Settings
| Parameter | Value |
|---|---|
| Certificate file | <Certificate downloaded from UEM Onboarding Config> |
| Destination store | Computer certificate store – Root |
Assignments
| Groups |
|---|
<Intune Device Group> |
<Intune User Group> |
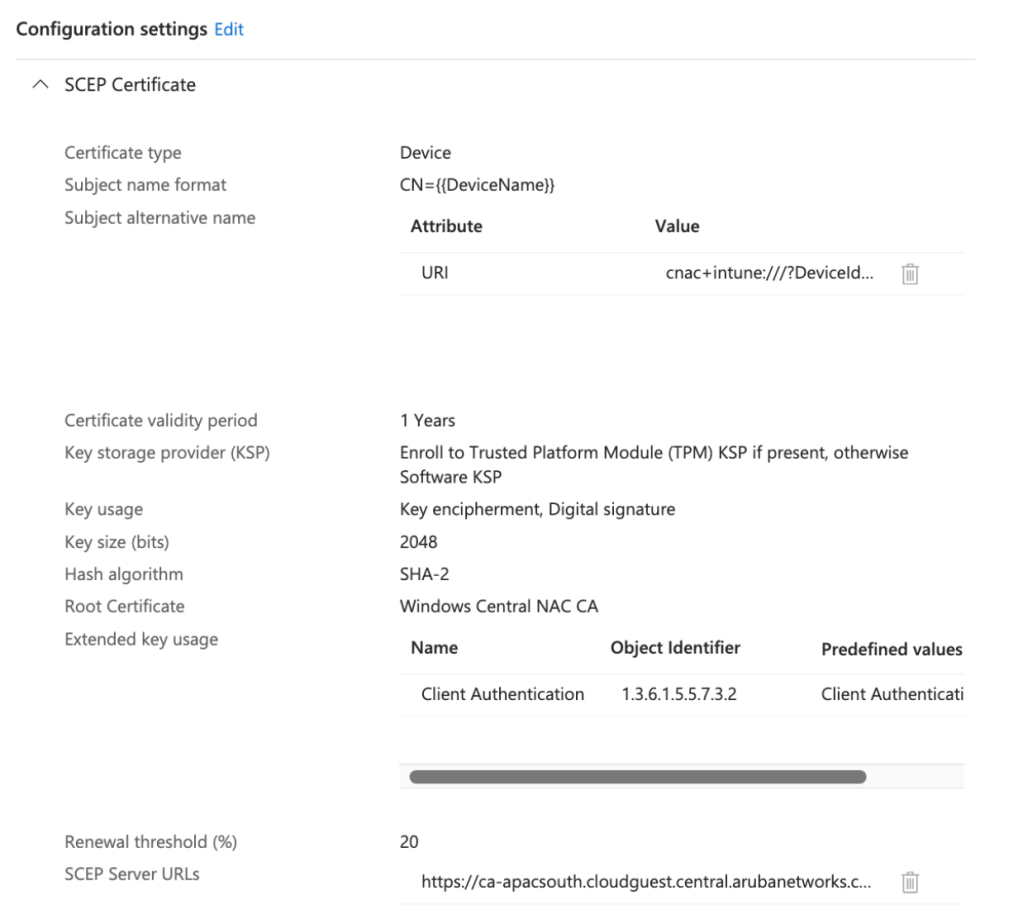
Microsoft Intune – SCEP certificate profile – Device
Navigate to Microsoft Intune admin center > Home > Devices | Configuration profiles and Create a New Policy as follows:
| Parameter | Value |
|---|---|
| Platform | Windows 10 and later |
| Profile type | Templates |
| Template name | SCEP certificate |
| Name | Windows SCEP Device Certificate |
Configuration Settings
| Parameter | Value |
|---|---|
| Certificate type | Device |
| Subject name format | CN={{DeviceName}}} |
| Subject alternative name | URI cnac+intune:///?DeviceId={{DeviceId}} |
| Key storage provider (KSP) | Enroll to Trusted Platform Module (TPM) KSP, otherwise Software KSP |
| Key usage | Digital signature, Key encipherment |
| Key size (bits) | 2048 |
| Hash algorithm | SHA-2 |
| Root Certificate | <Trusted CA Certificate Profile> |
| Extended key usage | Client Authentication (1.3.6.1.5.5.7.3.2) under Predefined values |
| SCEP Server URLs | <SCEP URL from UEM Onboarding Config> |
Assignments
| Groups |
|---|
<Intune Device Group> |
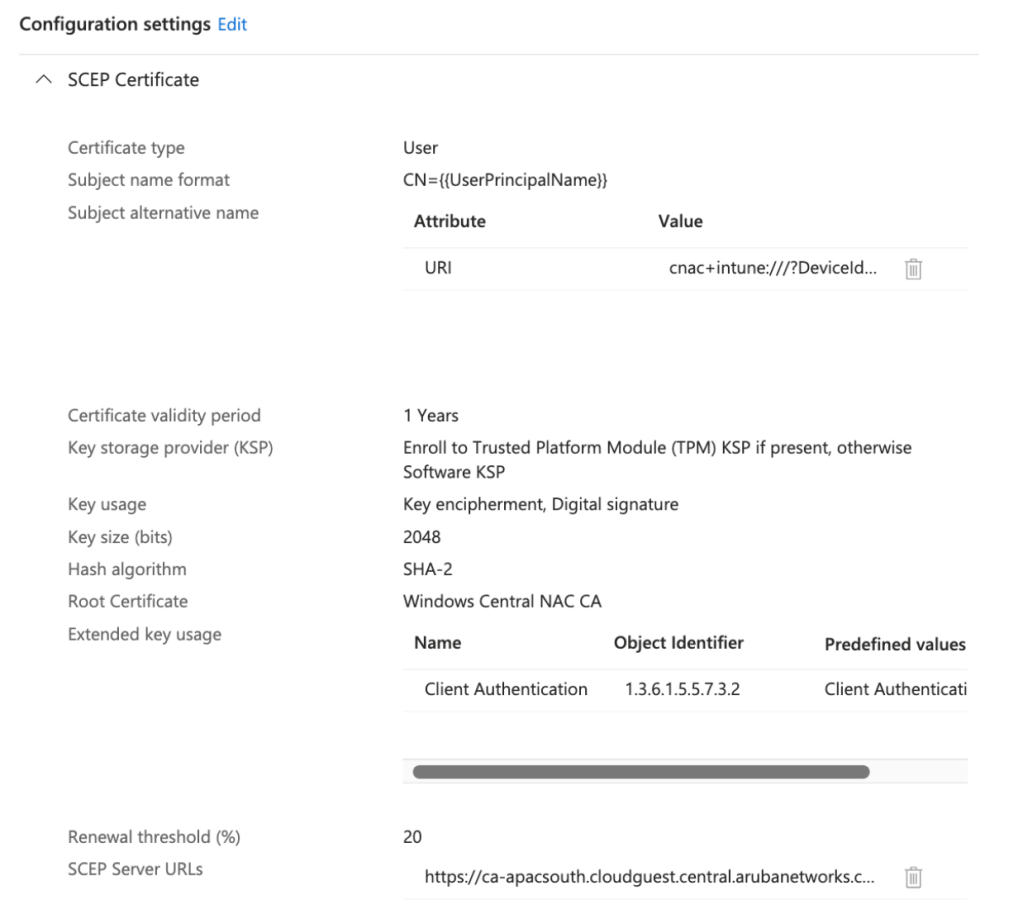
Microsoft Intune – SCEP certificate profile – User
Navigate to Microsoft Intune admin center > Home > Devices | Configuration profiles and Create a New Policy as follows:
| Parameter | Value |
|---|---|
| Platform | Windows 10 and later |
| Profile type | Templates |
| Template name | SCEP certificate |
| Name | Windows SCEP User Certificate |
Configuration Settings
| Parameter | Value |
|---|---|
| Certificate type | User |
| Subject name format | CN={{UserPrincipalName}}} |
| Subject alternative name | URI cnac+intune:///?DeviceId={{DeviceId}} |
| Key storage provider (KSP) | Enroll to Trusted Platform Module (TPM) KSP, otherwise Software KSP |
| Key usage | Digital signature, Key encipherment |
| Key size (bits) | 2048 |
| Hash algorithm | SHA-2 |
| Root Certificate | <Trusted CA Certificate Profile> |
| Extended key usage | Client Authentication (1.3.6.1.5.5.7.3.2) under Predefined values |
| SCEP Server URLs | <SCEP URL from UEM Onboarding Config> |
Assignments
| Groups |
|---|
<Intune User Group> |
Microsoft Intune – Wi-Fi profile
Navigate to Microsoft Intune admin center > Home > Devices | Configuration profiles and Create a New Policy as follows:
| Parameter | Value |
|---|---|
| Platform | Windows 10 and later |
| Profile type | Templates |
| Template name | Wi-Fi |
| Name | Windows Central NAC Wi-Fi |
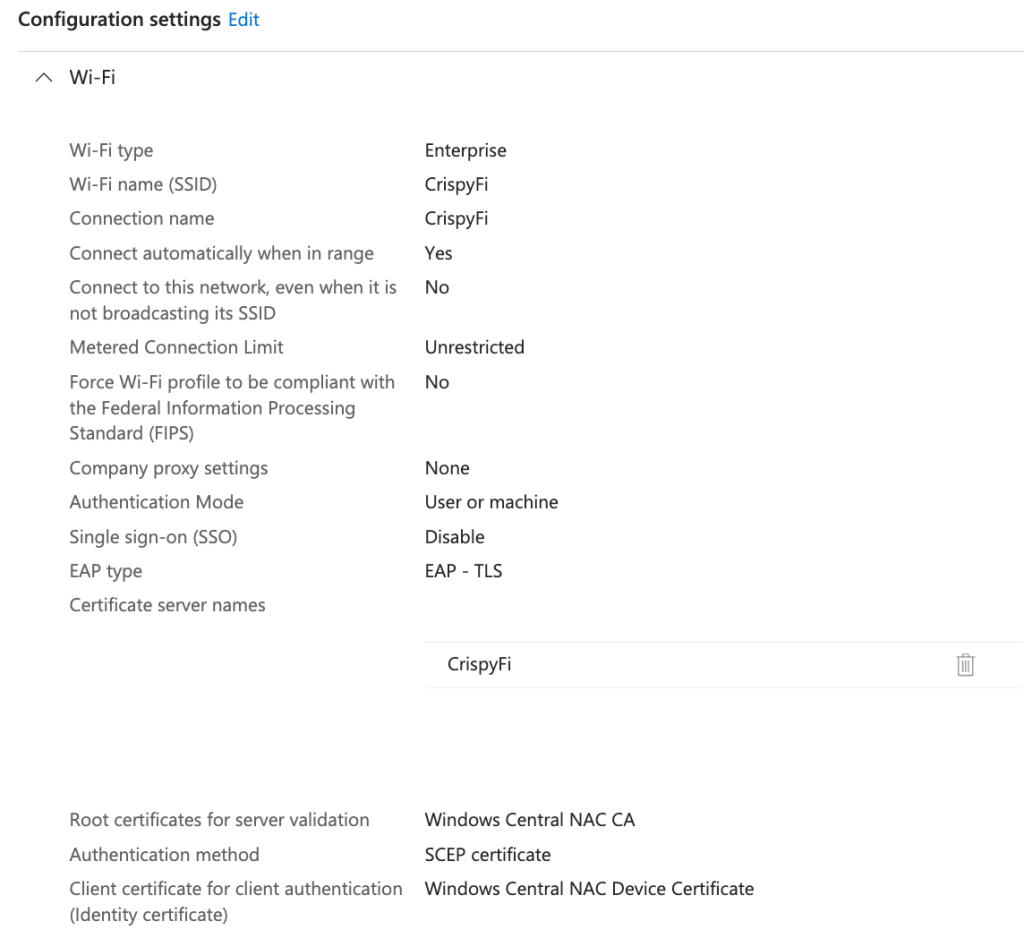
Configuration Settings
| Parameter | Value |
|---|---|
| Wi-Fi type | |
| Wi-Fi name (SSID) | <SSID name> |
| Connection name | <Connection name> |
| Connect automatically when in range | Yes |
| Authentication Mode | User or machine |
| EAP type | EAP-TLS |
| Certificate server names | <SSID name> |
| Root certificates for server validation | <Trusted CA Certificate Profile> |
| Authentication method | SCEP certificate |
| Client certificate for client authentication (Identity certificate) | <SCEP Device Certificate Profile> |
Assignments
| Groups |
|---|
<Intune Device Group> |
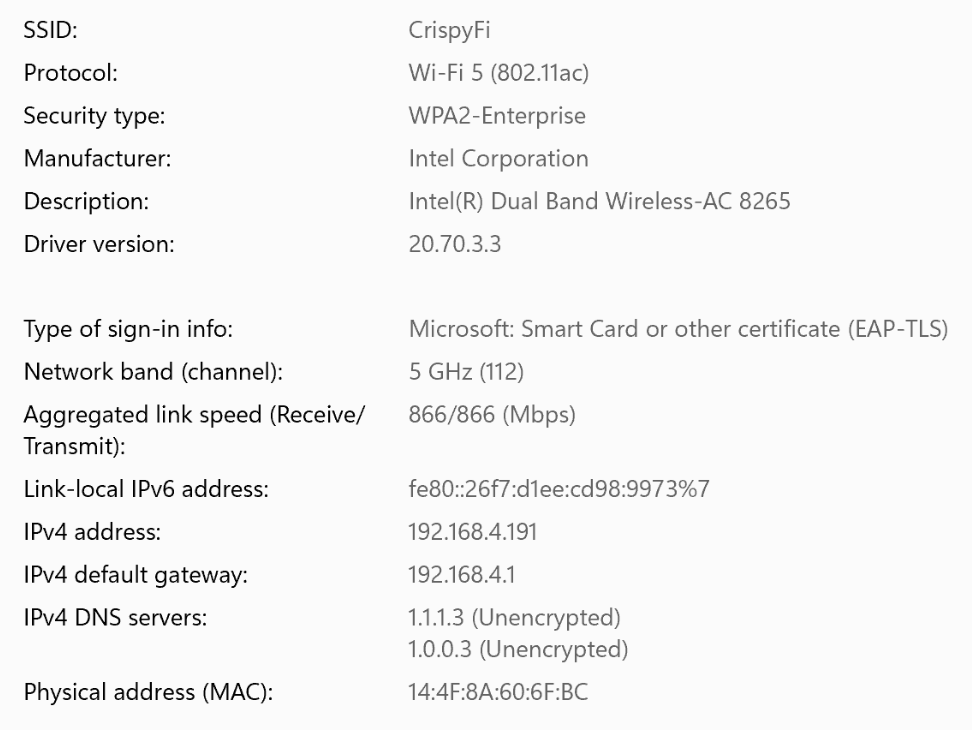
Deployed Windows 11 Configuration
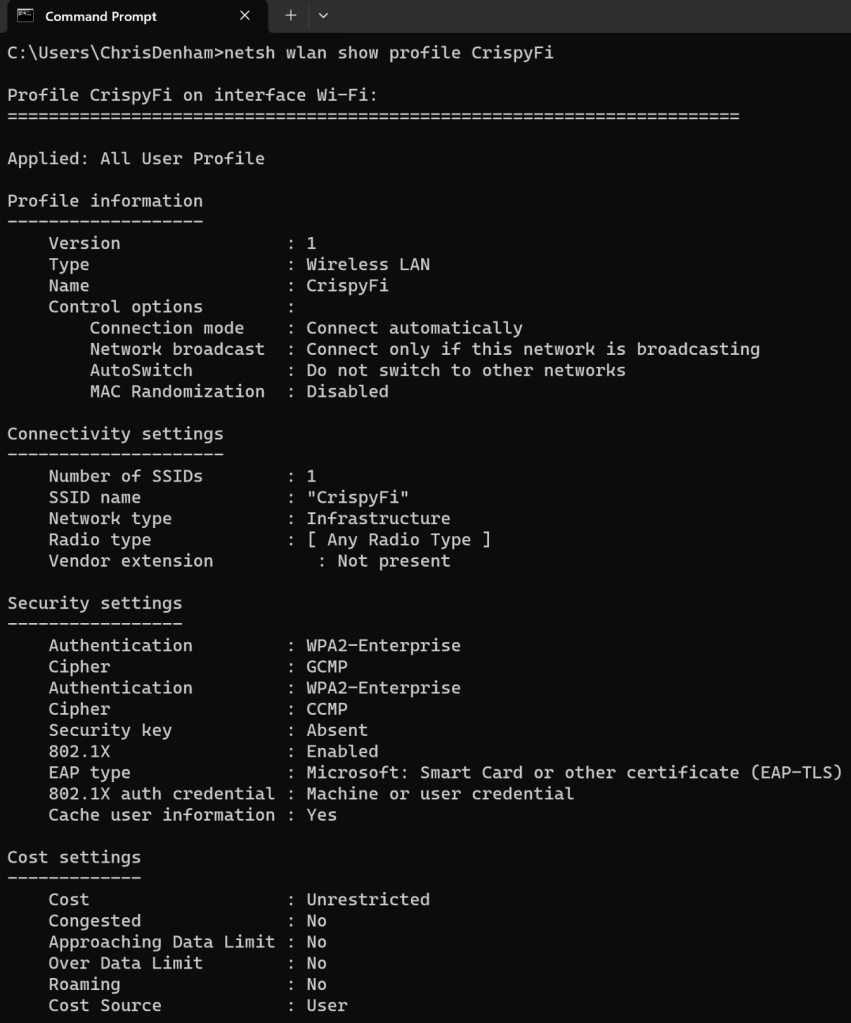
Although Windows is configured with WPA2-Enterprise, it will happily connect to a WPA3-Enterprise network.
The only differences between WPA2 and WPA3 Enterprise(CCM-128) are the use of a SHA-256 AKM (instead of SHA-1) and requiring Management Frame Protection (which can be used in a WPA2-Enterprise network anyway.
See below showing the 802.1X (SHA-256) (AKM 5) and FT-802.1X (AKM 3) for 802.11r capable clients.
Refer to the WPA3-Enterprise TechDoc for more information:
https://arubanetworking.hpe.com/techdocs/aos/wifi-design-deploy/security/modes/wpa3-enterprise/
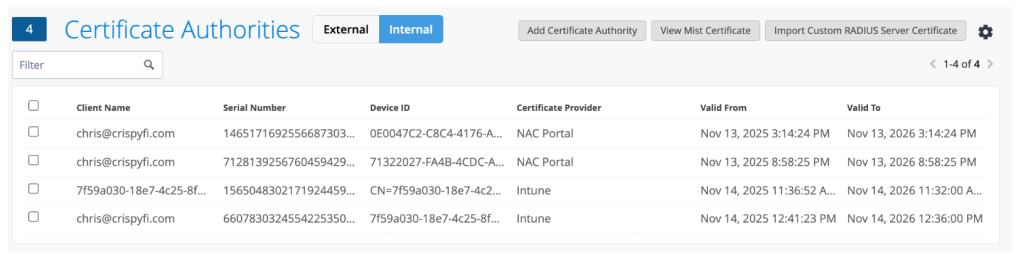
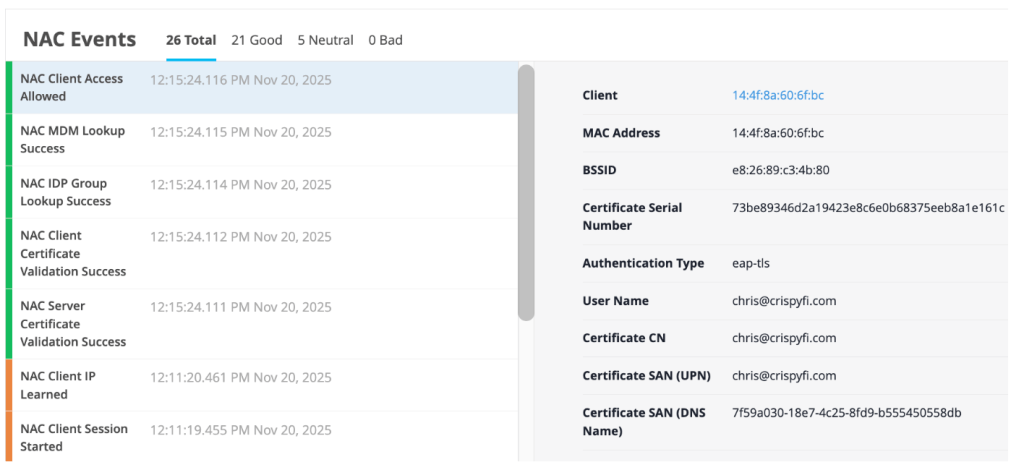
Verification
Navigate to Central NAC > Clients to view connections logs, with examples below.
Logs show up almost immediately, you just need to refresh the brower with Ctrl+r.
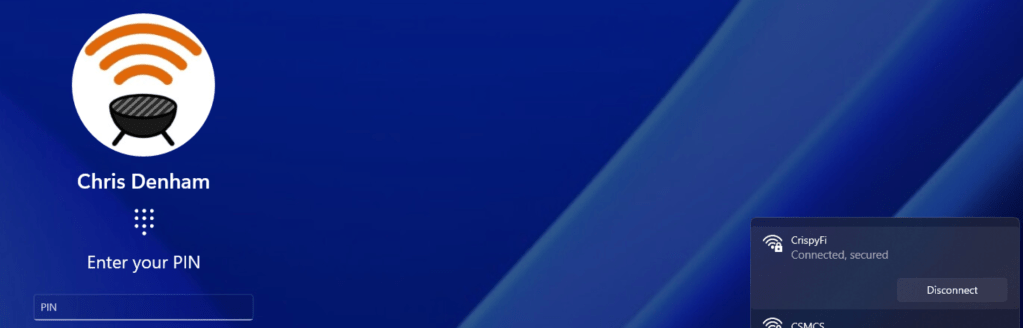
Computer authentication

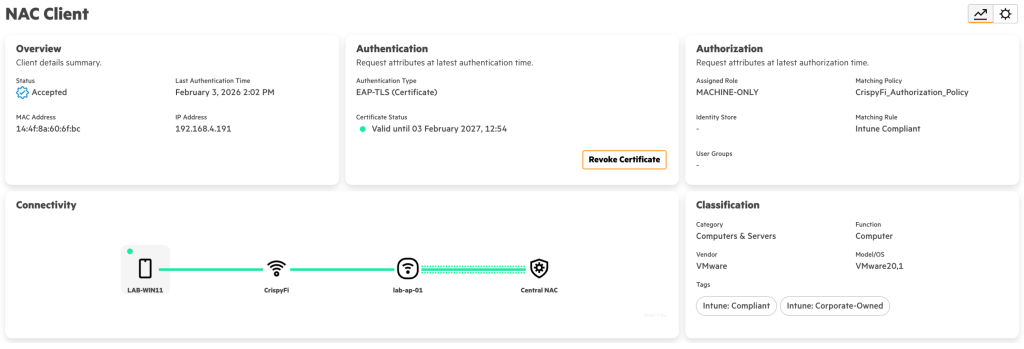

Computer automatically connected at logon screen:
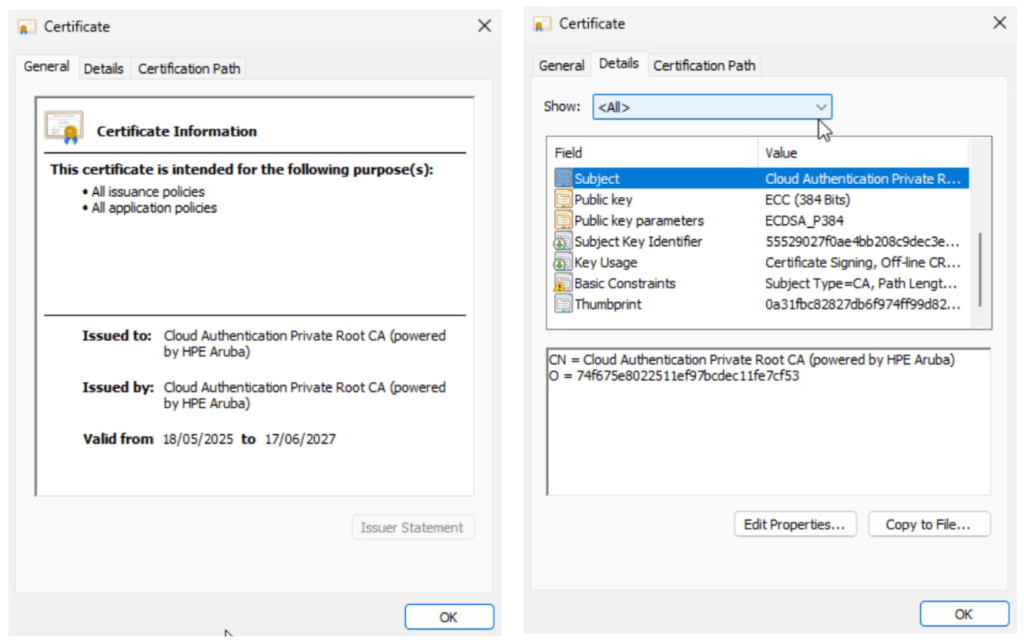
Certificate used for computer authentication:

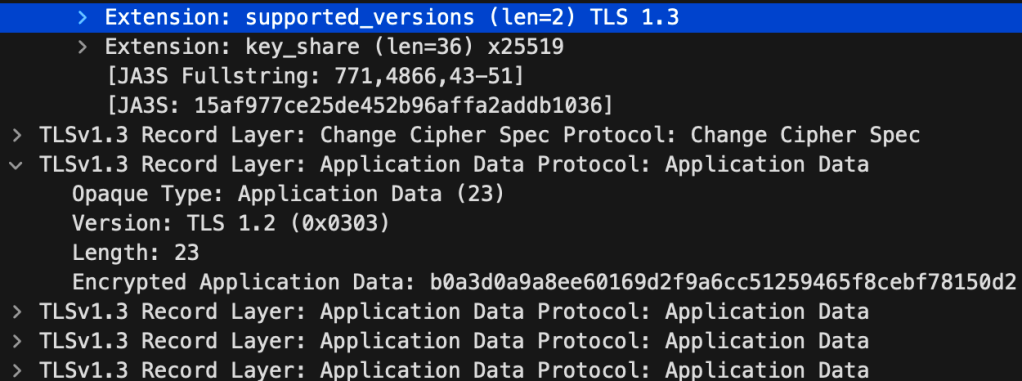
Packet capture of computer authenticaiton:
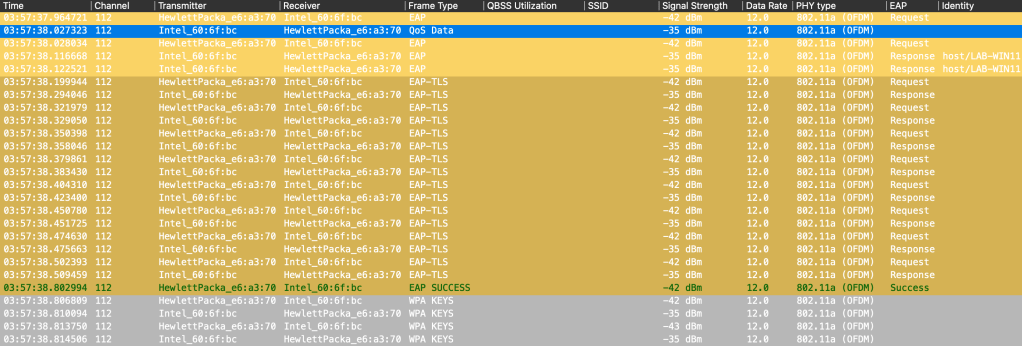
Central NAC is using TLS 1.3, which means the certificate exchange is encrypted:
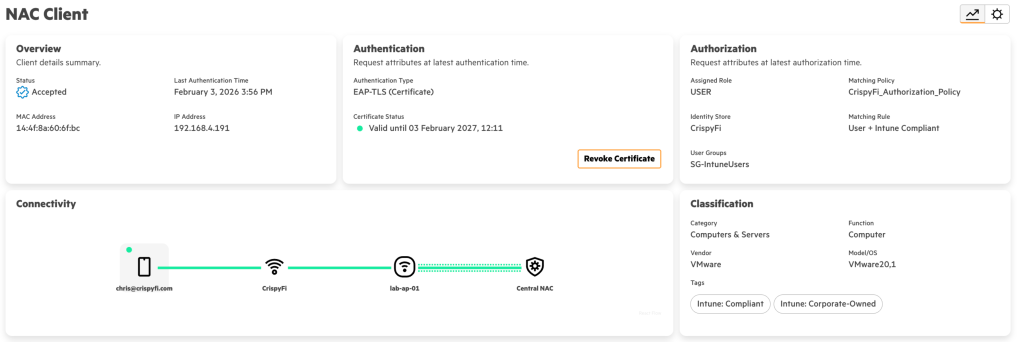
User authentication

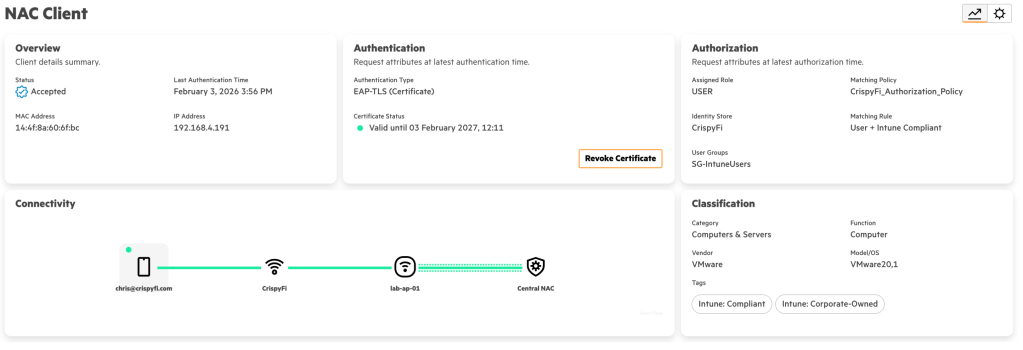

User automatically connected:
Certificate used for user authentication:
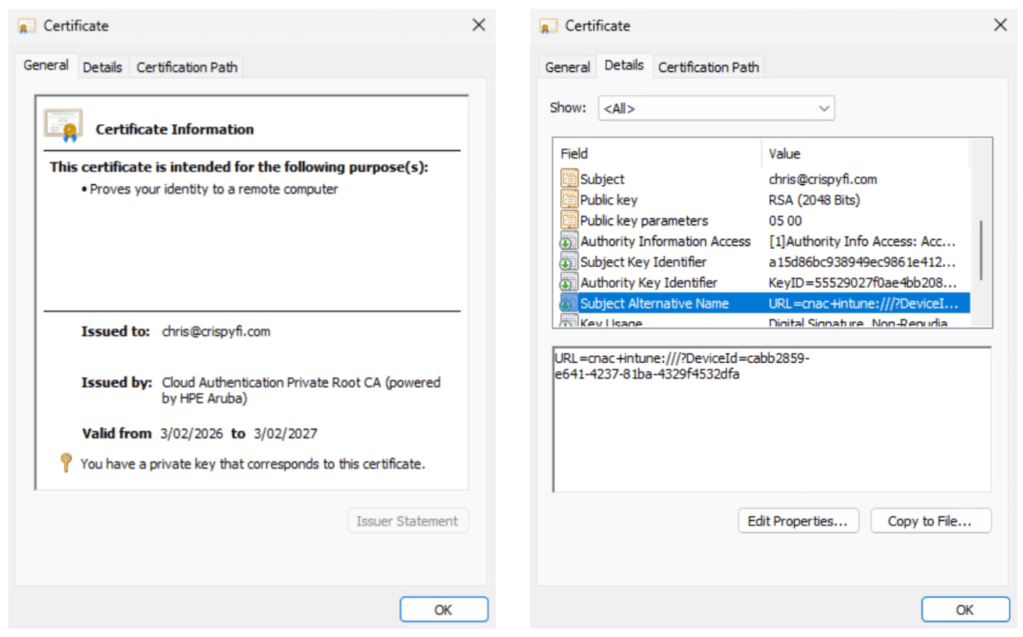
Private Root CA, created per Central tenant: