Overview
Personal Wireless Networks are a new addition to the HPE Aruba Networking Central Cloud Auth feature set.
In a nutshell, they provide a way to segment a network on a per-user or device basis, without requiring certificates.
User experience
Users can access a self-service portal where they can login using SSO and obtain a pre-shared key to connect all of their devices to a Wi-Fi network.

For devices that don’t belong to an SSO enabled user, administrators can manually add a PSK and assign a Client Role, which supports a combination of Access Rules and VLAN assignment.

Traffic between devices using the same pre-shared key is permitted, with traffic between devices using different pre-shared keys is denied. Think private VLANs for Wi-Fi.
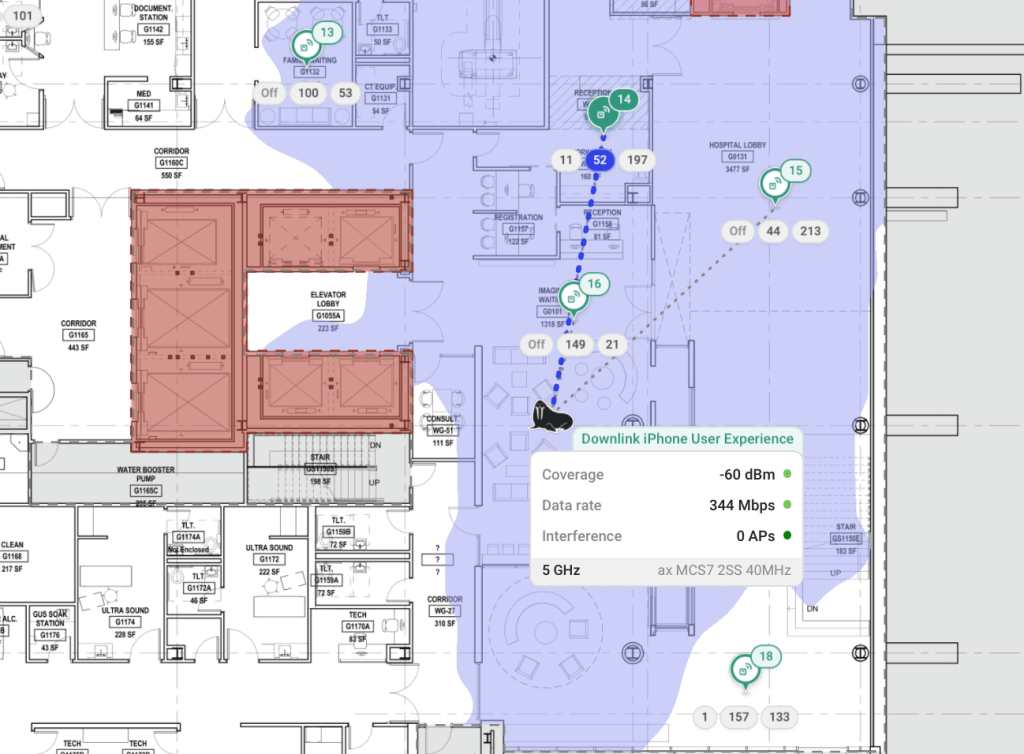
In my lab, I was able to verify this behaviour with a simple ping test between devices associated to different users.
Who can use it
There is a long list of use cases for this type of setup, but the most relevant are:
- BYOD, especially when devices don’t support certificate authentication
- Tenanted buildings (e.g. Retirement villages, university dorms)
- Headless or IoT devices
Why this is so cool
This is an awesome solution for a number of reasons:
- Devices are associated with a user for added visibility and control (i.e. logging and user off-boarding)
- Roles can be assigned based on Group membership from the chosen Identity Provider
- Cloud native solution with no additional licensing required
- Uses RadSec (RADIUS over TLS) for secure operation over the public Internet
- Not tied to device MAC address (no issues with MAC randomisation or iCloud Keychain)
- Setup can be done in a matter of minutes
- AirGroup can be used to share mDNS and DLNA servers between users, or by designating a server as publicly accessible (e.g. a printer that supports AirPrint)
- Look Mum, no certificates!
Things to keep in mind
- Based on WPA2, there is not yet a way to achieve this sort of functionality with WPA3-SAE key management.
- While there is Authentication and Authorisation for the self-registration portal, there is effectively only ‘identification’ and no ‘authentication’ of the user when devices connect to the network, since the PSK could used on any device.
- It’s worth mentioning that Cloud Auth supports an SSO-fronted self-registration portal for certificate enrolment against a per-tenant CA hosted in Central. This provides actual authentication and better security, with the tradeoff of a slightly more involved onboarding process.
What you need to make it work
- An HPE Aruba Networking Central account
- An Access Point running at least ArubaOS version 10.6.0.0
- An Identity Provider (e.g. Microsoft Entra ID)
Setting it up
If you want to try this out in your environment, feel free to follow along with my simple step by step instructions. I make labbing FUN!!
(I’m using Microsoft Entra ID as my Identity Provider)
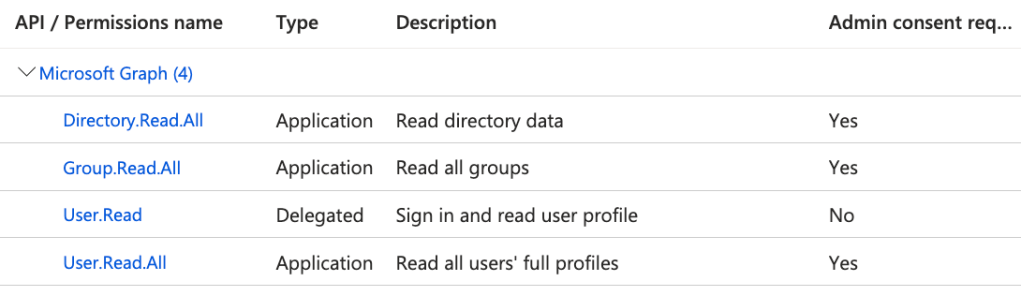
- Create a new App Registration
To begin, draw an S create a new App Registration, grant the following Microsoft Graph API permissions and create a new Client Secret. Don’t forget to record the value and put it in your password manager of choice.
If you get stuck, follow the Aruba quick start guide for Microsoft Entra ID here: https://www.arubanetworks.com/techdocs/central/latest/content/nms/policy/ca-azure.htm
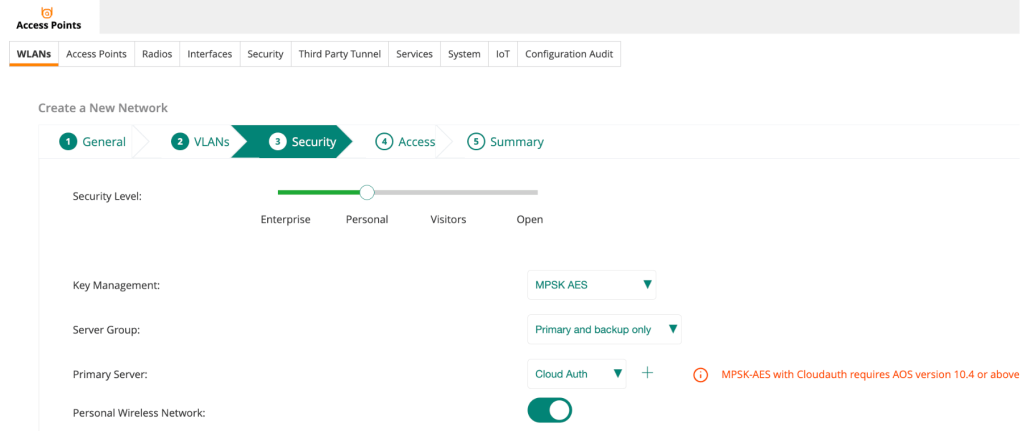
2. Create a new WLAN
Create a new WLAN under your desired Group with the following Security config:
- Security Level: Personal
- Key Management: MPSK AES
- Primary Server: Cloud Auth
- Personal Wireless Network: Enable
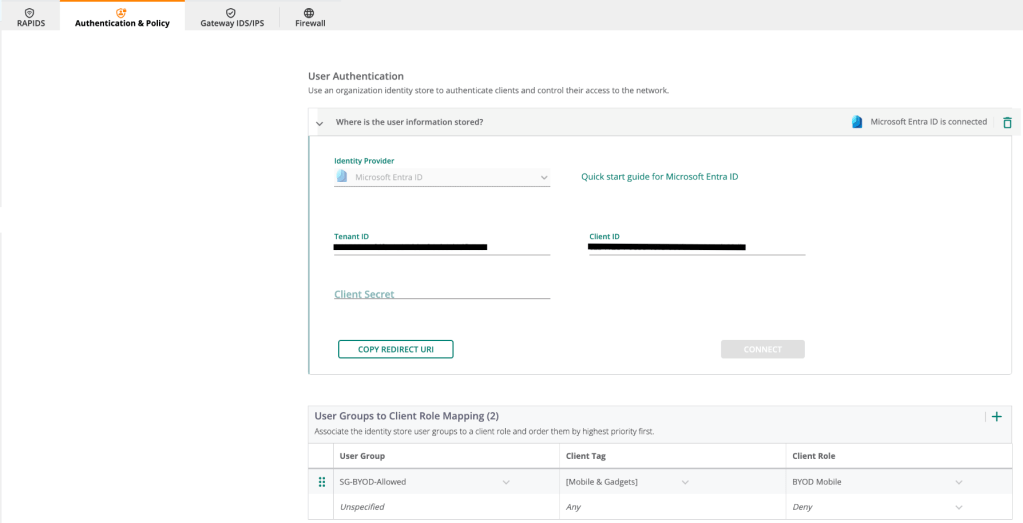
3. Configure Central User Authentication
Login to Central, navigate to Global > Security > Authentication & Policy > Config and Edit the User Access Policy.
Select Microsoft Entra ID as the Identity provider and populate the info from your new App Registration.
Copy the Redirect URI and enter it under Authentication in the App Registration.
Click Connect and you should be able to find and select a user group from Entra ID, filter on a specific Client Tag, and assign a corresponding role.
Click Save when you’re done.
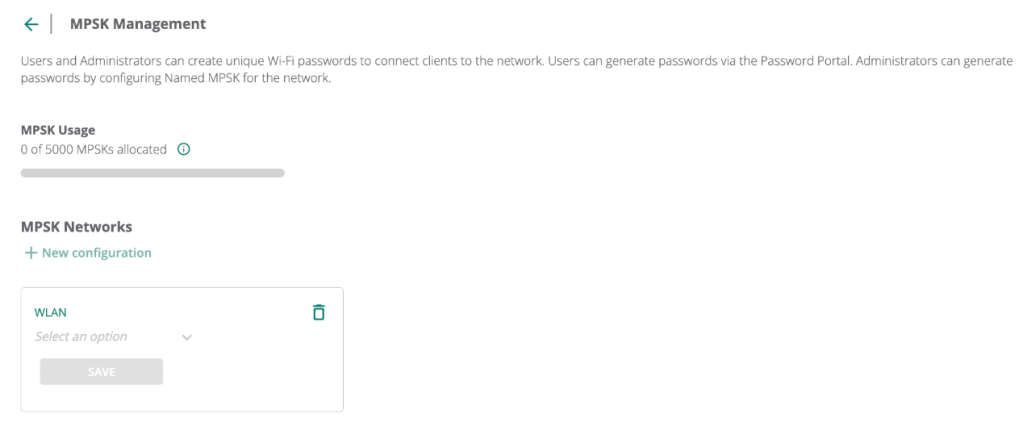
4. Configure Central User Authentication
Click Manage MPSK, select the WLAN you recently configured and click Save.

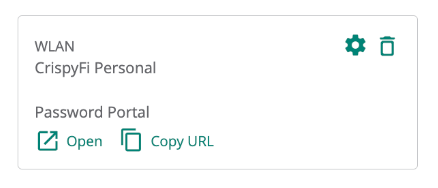
5. Register a device
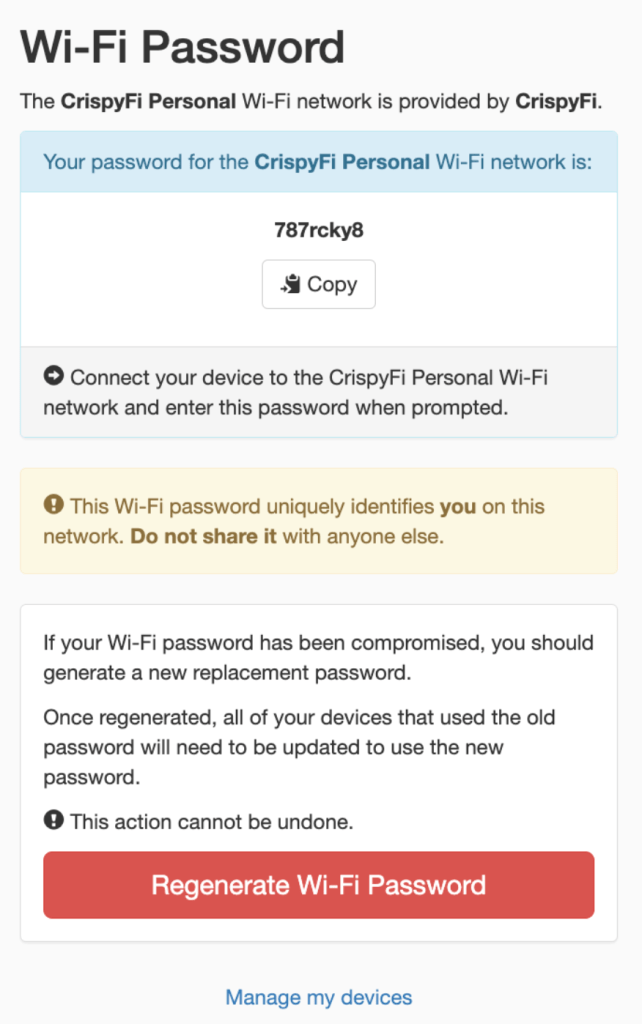
Open the Password Portal link and sign-in using SSO.
Copy the generated PSK and use it to connect your devices.
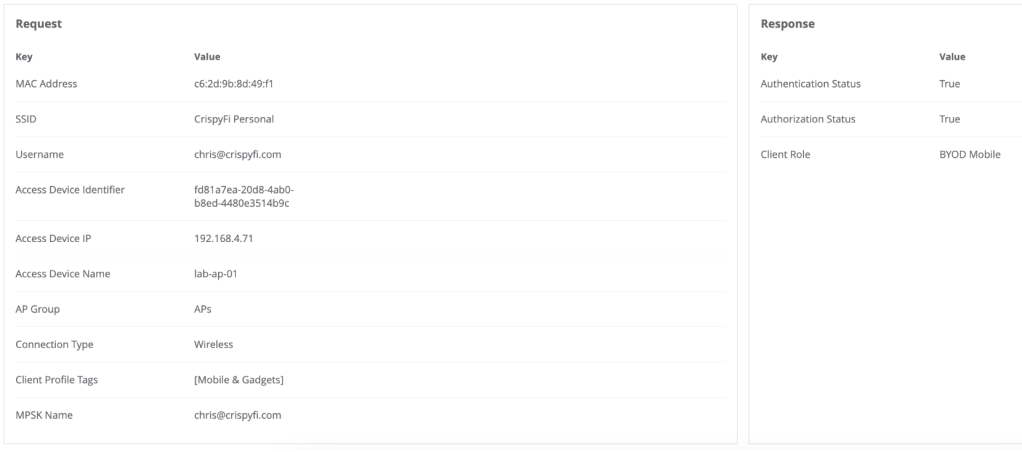
Authentication & Policy Logs
You can view logs and sessions under the Authentication & Policy view.
Notice how the associated username for the device is shown in the logs.
If a user was no longer a member of the configured group, their devices would no longer be allowed to connect.


Clients view

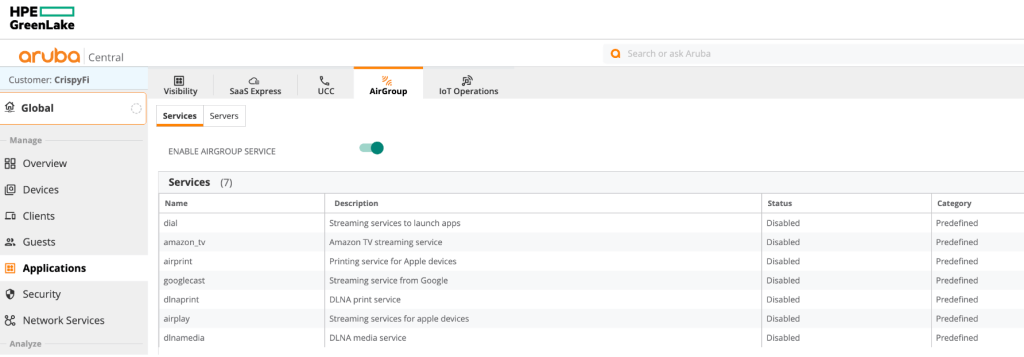
AirGroup
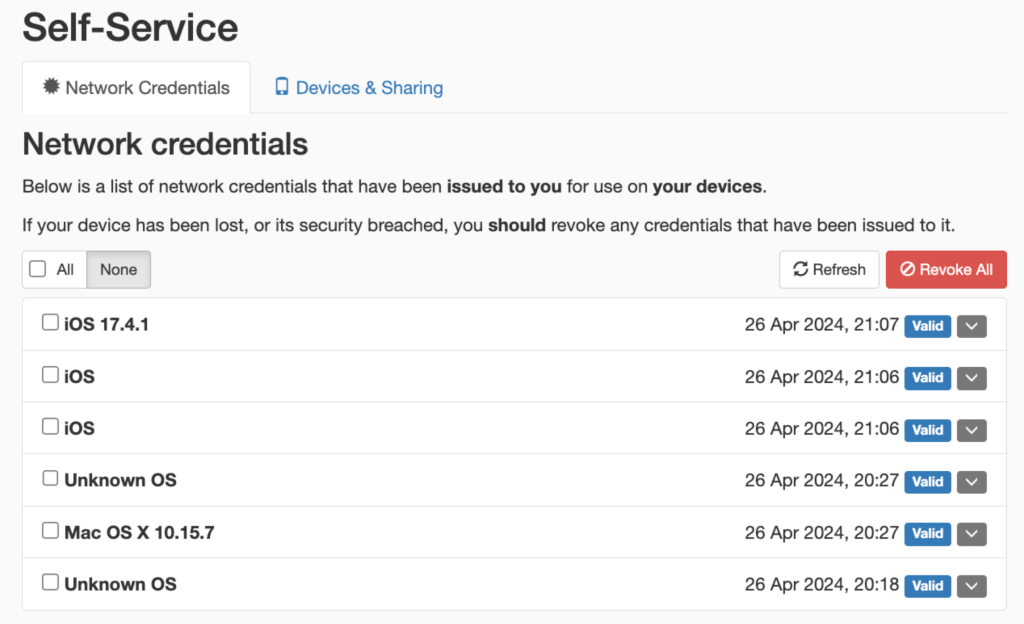
While I didn’t fully configure and test AirGroup for the purposes of the blog, I did enable it along with Personal device visibility and sharing to allow users to view their list of devices and setup sharing.

Here is what the Self-Service portal looks like:
Closing thoughts
Personal Wireless Networks are another great addition to the list of available options for getting users and devices connected to Wi-Fi.
As always, there is no ‘one-size-fits-all’ approach and your organisation or customers’ security policy & requirements should be considered to determine whether it is an appropriate solution to use for a particular use case.
For more information on Personal Wireless Networks, check out the webinar below: